Overview
Custom warning messages provide a more noticeable way to let the user know that a validation rule has been violated. In this tutorial, the custom warning message will display beside the field of interest and will fade in and out so it’s noticeable to users.
YouTube
Out of the box Warning Message
Out of the box warning messages are a quick way to notify users if anything requires their attention. Notification messages appear at the top of the screen away from the fields that had validation rules violated.
In this case, we have a rule where if user enters in a percentage over 100, a warning message will appear and the field will be reset.

Custom Warning Label
Add a new label to the form and have it appear to the right of the field requiring the error message.
It is ideal to make the font color red and bold the text.

Update Field OnChange Property
The field that requires the validation rule will need it’s OnChange property updated. In this case, there is a rule if a value is enter over 100, warning message is display and the field is reset.
With the new error message, we are going to update a variable called displayFadeIn and set to true.
UpdateContext({displayFadeIn: true});

Fade In Timer
A new timer should be added to the screen called timer_FadeIn and the duration should be change to 2000 (2 seconds)

The AutoStart property of the FadeIn timer will reference the displayFadeIn variable

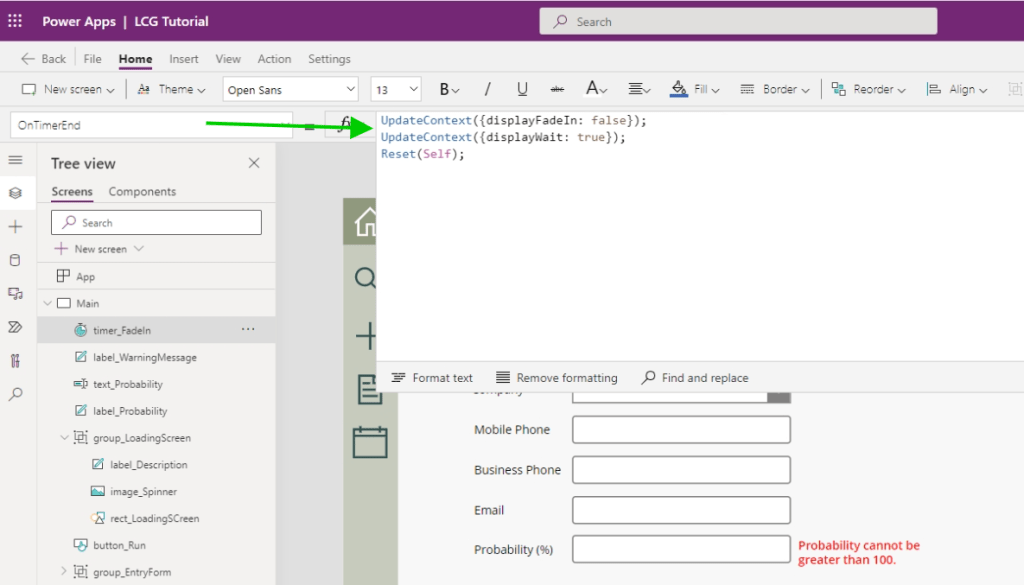
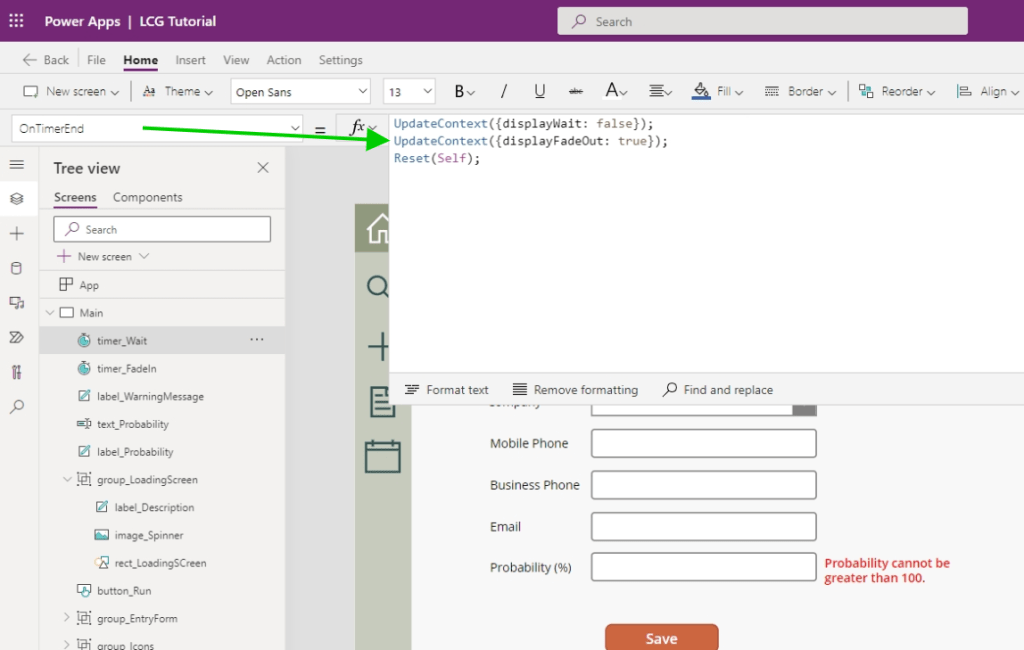
The OnTimerEnd property will set the displayFadeIn variable to false, update the displayWait variable to true and reset the current timer.
UpdateContext({displayFadeIn: false});
UpdateContext({displayWait: true});
Reset(Self);
This allows the warning message to be triggered multiple times by resetting the timer and variable that triggers it.
Wait Timer
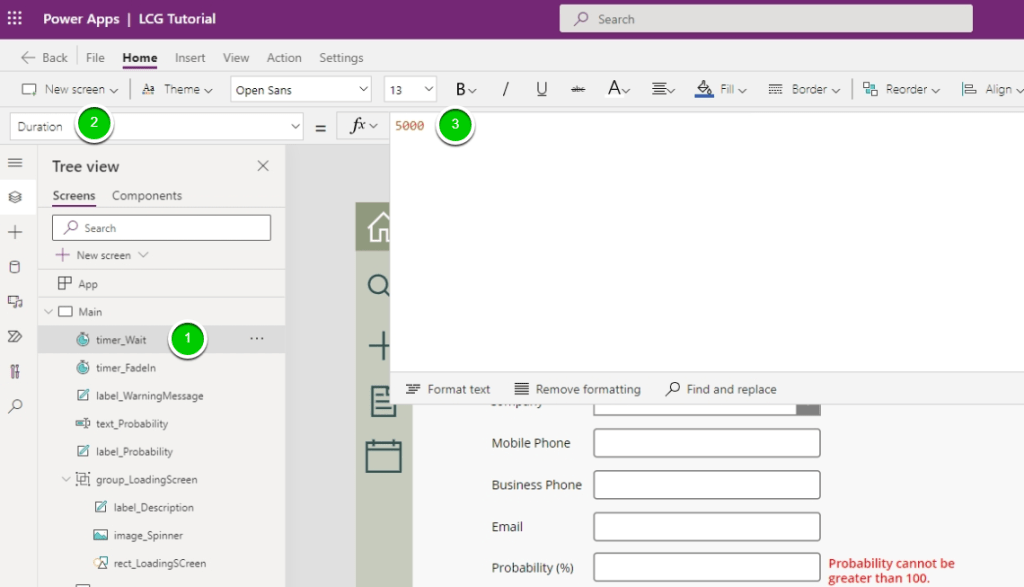
At this point we need a timer that will wait for about 5 seconds having the warning message as a solid red for that duration.
Add a new timer called timer_Wait, set the Duration property to 5000 (5 seconds)
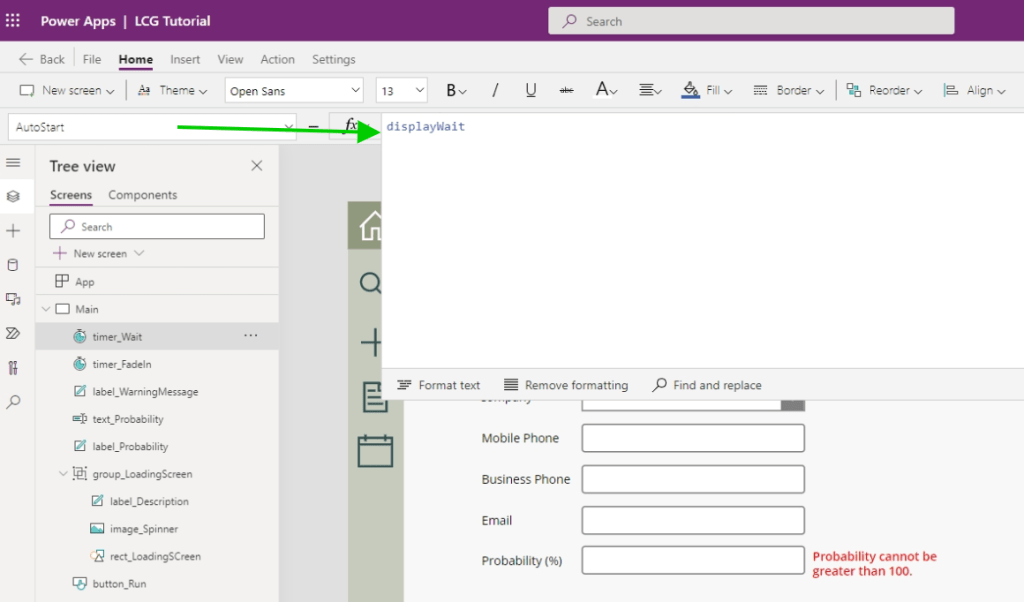
Change the AutoStart property to refer the displayWait variable that was set in timer_FadeIn’s OnTimerEnd.
The OnTimerEnd property will set the displayWait variable to false, update the displayFadeOut variable to true and reset the current timer.
UpdateContext({displayWait: false});
UpdateContext({displayFadeOut: true});
Reset(Self);
Fade Out Timer
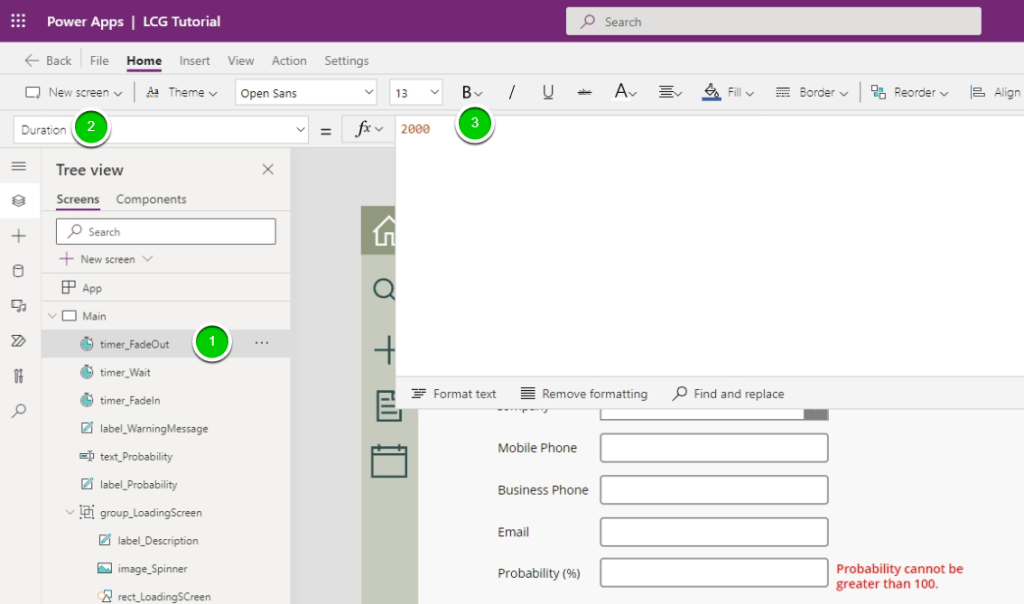
A new timer should be added to the screen called timer_FadeOut and the duration should be change to 2000 (2 seconds)
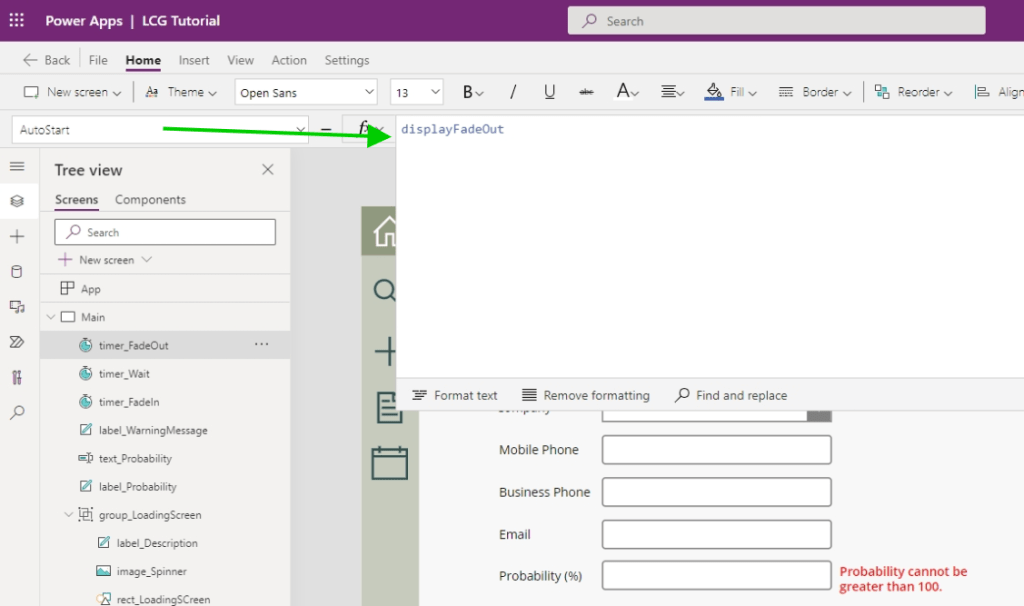
Change the AutoStart property to refer the displayFadeOut variable that was set in timer_Wait’s OnTimerEnd.
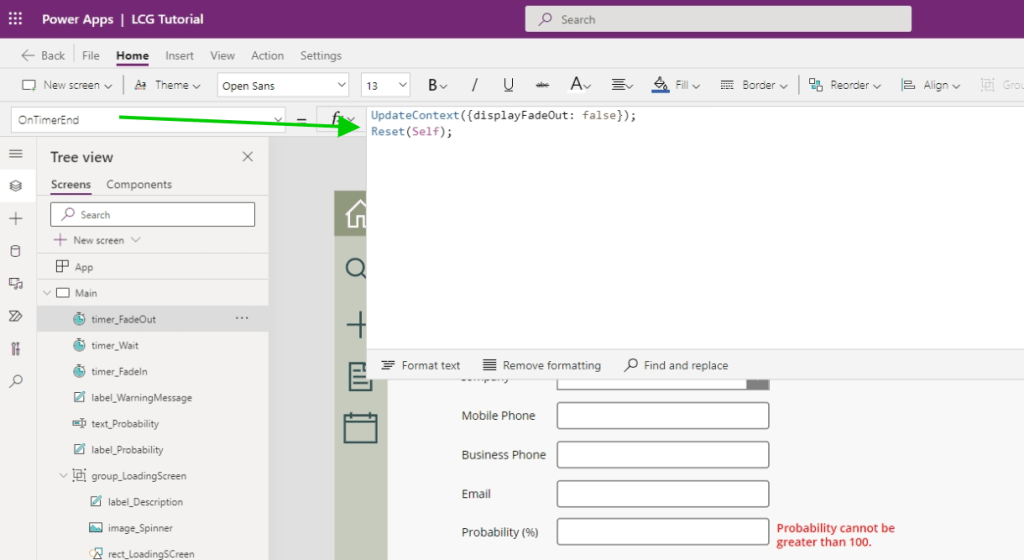
The OnTimerEnd property will set the displayFadeOut variable to falseand reset the current timer.
UpdateContext({displayFadeOut: false});
Reset(Self);
Warning Message Color Property
Update the Color property of the warning message. The alpha property (Transparency) will be modified to reflect the FadeIn, Wait and FadeOut calculations.
Fade In
This condition will refer to the timer_FadeIn control and the calculation will be timer_FadeIn.Value / timer_FadeIn.Duration. Transparency will start at 0 and move up to 1 in two seconds.
Wait
The condition for Wait will be set to 1; a solid color.
Fade Out
This condition will refer to the timer_FadeOut control and the calculation will be the inverse of fade in’s 1 – timer_FadeIn.Value / timer_FadeIn.Duration. Transparency will start at 0 and move up to 1 in two seconds.
Default
Default value should be 0 which is fully transparent and hidden from the user
RGBA(255, 0, 0,
    If(displayFadeIn,
        timer_FadeIn.Value / timer_FadeIn.Duration,
        If(displayFadeOut,
            1 - timer_FadeOut.Value / timer_FadeOut.Duration,
            If(displayWait,
                1,
                0
            )
        )
    )
)
The Result
At this point you can test the validation rule and it will fade in/out seamlessly (much better than the animated gif below).